Microfiber is everywhere: upholstery, cleaning cloths, automotive interiors, fashion accessories, and high-end home textiles. Its ultra-fine filaments make it soft, durable, and highly functional — but also make dyeing it a different challenge compared with natural fibers. If your brief is how to dye микрофибровая ткань, whether for a DIY project or scaling to industrial runs, this guide walks you from the chemistry to the practical recipes, covering embossed microfiber fabric, green microfiber fabric, heavy microfiber fabric and creative effects.
Microfiber basics — why dyeing microfiber fabric is different
Definition & composition. Microfiber refers to fibers finer than one denier — extremely thin synthetic filaments most commonly made from polyester (PET), polyamide (nylon), or polyester/nylon blends. Microfiber may be split (for cleaning cloths) or non-split (for suede-like finishes). The fabric’s hand, density, and finish depend heavily on yarn structure, weave/knit, and post-treatments (e.g., water repellents or stain finishes).
Key dyeing differences vs natural fibers
- Hydrophobic behavior: Polyester is inherently hydrophobic; it does not absorb water or water-based dyes easily.
- High-temperature requirement: Dye molecules must be driven into the polymer matrix. This typically requires high-temperature dyeing (high-temp disperse dyeing, often 120–140°C under pressure in industrial settings) or the use of carriers at boiling for home methods.
- Molecular fit: Synthetic dyes for polyester (disperse dyes) are small, non-ionic molecules that diffuse into the fiber under heat. Nylon (polyamide) is more receptive and can be dyed with acid dyes.
- Finishes & coatings: Many microfiber products have soil-resistant, omniphobic, or flame-retardant coatings that impede dye uptake. These either must be stripped (rare, chemical) or accepted as a limitation.
Because of these differences, the term “dying microfiber fabric” (note: common misspelling — here we use “dyeing”) requires a clear match of fabric type to dye chemistry.
Which dye to use
- Polyester microfiber → Disperse dyes (high-temp or carrier-assisted).
- Nylon (polyamide) microfiber → Acid dyes (low to moderate temperature, acid bath).
- Blends (polyester/nylon) → more complex: either separate dyeing strategies per fiber (piece-dyeing with multiple baths) or pick the dominant fiber and accept a compromise. Alternatively, consider solution-dyeing or sublimation/transfer printing for polyester-dominant blends.
Also, pigment coating (topical pigments bound with binder) is another approach when fiber penetration is not required (e.g., to preserve embossed texture).

Tools, equipment, and safety essentials
Small-batch / DIY equipment:
- Large, heavy-duty stainless-steel pot (non-reactive) or enamel pot dedicated to dyeing.
- Heat source (stove, portable burner).
- Long stainless steel or heat-resistant stirring implement.
- A thermometer capable of up to 140°C (industrial) or at least to 100°C (for boiling methods).
- Personal protective equipment: nitrile gloves, waterproof apron, eye protection, and good ventilation or fume extraction.
- Measuring scales (grams) and graduated beakers.
- Acid (white vinegar) for nylon; sodium carbonate/soda ash for pH adjustment when required.
- Dispersing agent or carrier for polyester (if using carrier method).
Industrial equipment: jet dyeing machines, high-pressure autoclaves for HT dyeing at 130°C, winch dyeing for heavy fabrics, high-volume rinsing, and wastewater treatment systems.
Safety notes: Disperse dyes and carriers can be hazardous; read MSDS. High-temperature dyeing under pressure is dangerous without proper equipment. Always ensure proper PPE and ventilation.
Chemistry explained succinctly
- Disperse dyes: Non-ionic, finely ground dyes originally developed for synthetic fibers. They’re insoluble in water but suspend as fine particles (hence “disperse”). High temperature increases fiber polymer mobility so dye molecules diffuse into the amorphous regions of polyester. Industrial high-temp dyeing (HT) uses 130°C under pressure for efficient penetration; home methods use carriers at boiling or long boiling times to aid uptake.
- Acid dyes: Ionic dyes suitable for polyamide (nylon). They bond via ionic interactions and hydrogen bonding when the bath is acidic (typically pH 4–5 using acetic acid/vinegar). Heating to 80–95°C helps fixation.
- Sublimation dyes: Dye-sublimation inks transfer from paper to polyester under high heat and pressure (typically 180–205°C). The dyes sublimate and diffuse into the polyester surface, making it excellent for printing or photographing on polyester microfiber (which requires a content of more than 90% polyester). Not suitable for nylon.
- Solution dyeing (dope dyeing): Color added during fiber extrusion; the most colorfast and low-impact option, but only at the manufacturing stage, not post-fiber. Often used to create “green microfiber fabric” with durable color and less water.
Practical step-by-step: dyeing polyester microfiber
Two practical methods: (A) Home/Small-batch (carrier-assisted or extended boil) and (B) Professional High-Temperature (HT) pressurized method. I’ll show both.
A — DIY / Stove-top method (for small items, upholstery covers are removable)
Warning: This gives good color on thin-to-medium-weight polyester but is limited vs industrial HT. Use only on items that tolerate water/heat.
Materials & ratios (sample):
- Fabric weight: 1 kg (for scaling).
- Disperse dye: 2–3% owf (on weight of fabric) for medium shade — i.e., 20–30 g for 1 kg fabric.
- Carrier (if used): follow product instructions; carriers are usually 5–10 g per liter or a % of bath. Carriers can be smelly and are chemical; use only when necessary.
- Water: ratio fabric: water = 1:20 (i.e., 20 L for 1 kg) to ensure movement.
- Wetting agent/dispersant: a small amount (1–2 g/L) helps distribution.
Procedure:
- Pre-wash the fabric in hot water with mild detergent (no fabric softeners) to remove finishes, oils, and sizing. Rinse well. Weigh the wet fabric so you can calculate volumes. (For upholstery covers, wash separately.)
- Fill the dye pot with enough water (1:20 ratio). Heat to near boil. Dissolve the disperse dye in a small amount of boiling water to make a concentrated stock solution, then add it to the main pot. Add dispersing agent.
- Add a carrier if you choose a carrier-assisted method. Carrier lowers the required temperature and helps dye penetrate polyester. Use only recommended amounts in a well-ventilated space.
- Introduce fabric gradually to the pot to avoid air pockets and uneven uptake. Maintain a slow rolling boil or high simmer. Keep fabric moving by gently stirring or using a mesh to circulate.
- Maintain temperature and time. For carrier-assisted at boiling: 60–90 minutes of agitation is typical. For long-boil without a carrier, 90–120 minutes may be required. Longer = deeper penetration, but watch the mechanical stress on delicate textiles.
- Cool gradually. After time elapses, reduce the heat and cool the bath gradually (some recommend cooling in the bath to lock the dye).
- Rinse thoroughly: Warm rinse, then decrease to cool until clear. Use a gentle detergent rinse to remove surface dye.
- Fixative step: Not always necessary for disperse dyes, but a post-dye soak with a mild fixative specified by the dye manufacturer increases washfastness.
- Dry: Air dry away from direct heat/sun; use tumble low only if fabric care allows.
Notes: For heavy microfiber fabric, increase time and ensure a larger bath to allow fabric movement. See the heavy fabric section.
B — Professional HT method (industrial reference)
Environment: High-pressure autoclaves or jet dyeing machines. Temperatures ~130°C (266°F) for 30–60 minutes with controlled ramping and cooling. Dyes are dispensed precisely by weight; liquor ratios are optimized (lower L: R possible due to machine agitation). Results: superior penetration, colorfastness, and reproducibility.
Dyeing nylon (polyamide) microfiber
Nylon is more receptive and is dyed with acid dyes.
Sample recipe (1 kg fabric, medium shade):
- Acid dye: 2%–3% owf = 20–30 g per 1 kg fabric.
- Acetic acid (vinegar): 50–100 mL per 10 L water, adjust to pH ~4.5.
- Salt (optional): 20–30 g/L can help level.
- Water ratio: 1:20–1:30.
Procedure:
- Pre-wash as above.
- Prepare bath; dissolve dye in warm water; mix into main bath.
- Add fabric; slowly increase temperature to 85–95°C (185–203°F). Maintain for 30–60 minutes with gentle agitation.
- Cool, rinse, optionally use a mild fixative/rinser, and dry.
Notes: Because acid dyes attach via ionic interactions, washfastness is generally good, but salt and pH control improve levelness.

Blends and tricky cases
Blends are the most frustrating. Options:
- Dual-bath approach: Dye with disperse dye for polyester first (HT or carrier), then dye with acid dye for nylon. But beware: temperatures and chemicals may affect the first dye job.
- Choose one fiber to prioritize: Accept compromise — e.g., if polyester is dominant, use disperse methods and expect modest nylon uptake.
- Surface pigment coating or printing: When even color is more important than fiber-penetrating dye, pigment coating or printing may be the best choice. Pigment systems sit on the fabric surface with a binder and allow bright colors and preserve textures like embossing.
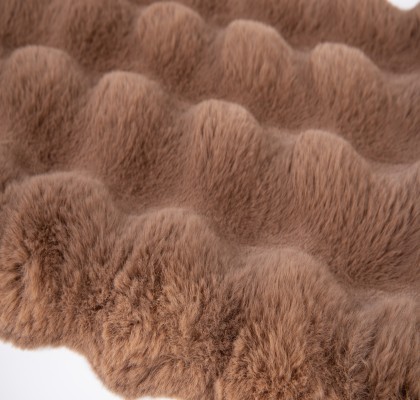
Embossed microfiber fabric — protecting texture while dyeing
What is embossed microfiber fabric? Surface texture is mechanically impressed (heat + pressure) to create suede-like patterns, geometric motifs, or branding marks. Often used in automotive interiors and upholstery.
Challenges: Immersion dyeing can soften embossing or cause differential uptake across raised/depressed areas, leading to contrast loss or patchiness.
Strategies:
- Test first: Always dye a spare sample and verify embossing integrity and color.
- Avoid high mechanical agitation: Gentle movement preserves embossing. Use larger baths to let fabric float.
- Prefer surface methods if embossing must be pristine: Pigment coating, spray dyeing, or pad-dyeing (padding) can color mostly the surface while maintaining relief.
- Use lighter shades to keep the emboss contrast visible. Very dark colors flatten the texture visually.
- Sublimation printing can be used to add patterns without heavy wet processing (for polyester microfiber) — but sublimation heat itself can soften embossing if the temperature/time are too high; test carefully.
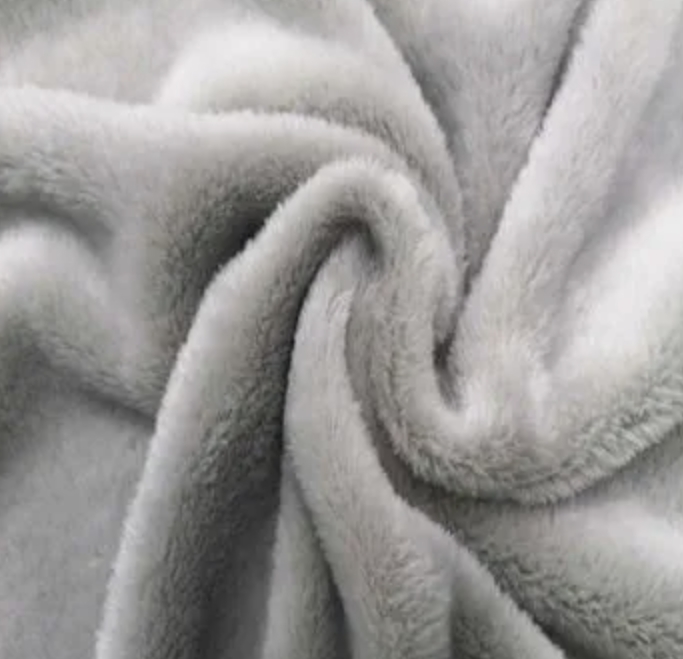
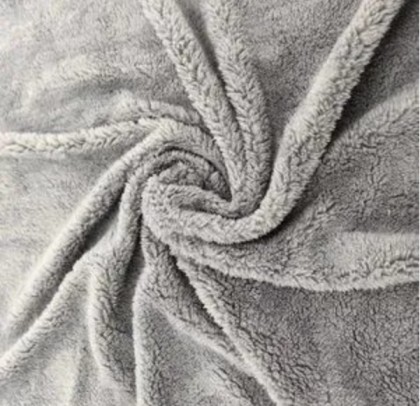
Heavy microfiber fabric — get color deep into dense piles and thick pieces
Problems: High GSM and dense pile prevent easy dye penetration; the result can be top-surface color only.
Solutions & rules of thumb:
- Increase liquor ratio to improve movement (but industrial machines often use low-liquor ratios with better agitation). As DIY, keep larger bath volumes.
- Raise dye concentration and extend time: For 2% owf insufficient, consider 3–5% owf for medium to dark shades on heavy goods. Example: 1 kg heavy fabric might need 50 g dye (5% owf) for dark tones.
- Use stronger agitation (but not so much mechanical stress to damage the pile) — stir carefully and use a longer soak.
- Pre-condition: Steam or pre-wet under pressure can open fibers for better penetration. Some mills pre-steam heavy goods.
- Consider piece-dyeing machines or jet dyeing — heavy fabrics benefit from industrial equipment.
Green microfiber fabric — two meanings and how to achieve each
Two meanings:
- Green as a color — dyeing to produce green shades.
- Green as sustainability — eco-friendly microfiber (recycled PET, low-impact dyeing, solution dyeing).
10.1 Achieving green color (practical tips)
- Mix disperse yellow + disperse blue for polyester. For stability, many manufacturers provide premixed green disperse dyes.
- For consistent green across batches, rely on lab recipes (small variations in dye mixing produce tint shifts). Keep records: grams of each dye per kg of fabric.
- Test under actual wash/light exposures historically to ensure green doesn’t fade to yellow or blue.
10.2 Creating eco-friendly/green microfiber fabric
- Solution-dyed fibers and recycled PET are industry best practices for ‘green’ claims. Solution-dyed fibers add pigments at the polymer melt stage — near-zero water, excellent colorfastness.
- Supercritical CO₂ dyeing reduces water usage drastically; this technology is growing for polyester.
- Low-impact disperse dyes and improved wastewater treatment are other measures. If your brand requires a “green microfiber fabric” claim, confirm supply chain certifications (GRS, OEKO-TEX, Bluesign).
Sublimation & digital printing — an alternative route
When to use: Sublimation offers photographic-quality prints and vibrant colors for polyester microfiber (≥90% polyester).
How it works (brief): Sublimation inks printed on transfer paper are heat-pressed onto polyester; dyes sublimate (solid → gas) and penetrate the polyester surface. Typical heat/press settings: 180–205°C (356–401°F) for 30–90 seconds, depending on fabric and ink system.
Advantages: full-color, crisp images, excellent washfastness (on polyester), minimal water use.
Limitations: Not for nylon, not for heavily textured or embossed fabrics that will deform under pressing temperatures. For large upholstery pieces, sublimation is typically used on fabric rolls rather than finished cushions.
Pigment coating and printing — when fiber penetration isn’t required
Pigment systems are surface-applied: pigments + binder + crosslinker. They allow bright, opaque colors, maintain embossed textures if applied thinly, and are economical. Typical use-cases: upholstery where colorfastness to light and abrasion matters, but absolute fiber dye penetration is not necessary.
Key tradeoffs: Pigment prints may feel different (slightly stiffer if heavy pigment), and washfastness depends on binder quality. For upholstery, dry-clean or professional cleaning compatibility must be checked.
Creative dyeing techniques on microfiber
- Ombre/dip-dye: Slowly lower fabric into the bath to achieve a gradient. For polyester, do this with the carrier method or with staged immersion and careful agitation.
- Tie-dye on microfiber: Disperse dyes + heat-set via steaming or long boil. Microfiber’s tight weave will limit classic “sharp” tie-dye results, but soft, painterly effects look good on suede-like microfiber.
- Shibori/resist techniques: Use resist binding, but remember that color penetration may be weaker; the result will be subtler.
- Spot dyeing/spray: For custom shading or repairs, use disperse dye solutions applied with a spray gun and then heat-fixed (steam or press). Test on scrap to avoid blotches.
- Sublimation printing: Best for detailed, high-color designs on polyester microfiber.
Exact sample recipes and math
Terminology: owf = on weight of fabric; L: R = liquor ratio (water weight: fabric weight).
Sample 1 — Polyester medium shade (home method, 1 kg fabric)
- Disperse dye: 2% owf → 20 g dye powder.
- Water: L:R = 1:20 → 20 L water.
- Dispersing agent: 1–2 g/L → 20–40 g.
- Carrier (optional): per product; careful ventilation.
- Time/temp: boiling with carrier or high simmer, 60–90 minutes. Stir constantly.
Sample 2 — Polyester deep/dark shade (industrial)
- Disperse dye: 4–6% owf → 40–60 g per 1 kg fabric.
- HT dye: 130°C for 30–45 minutes in a pressure vessel.
- After-dye wash and soaping.
Sample 3 — Nylon medium shade (1 kg)
- Acid dye: 2.5% owf → 25 g.
- Water: 20 L.
- Acetic acid (glacial diluted) or white vinegar to pH ~4.5.
- Time/temp: 85–95°C for 30–45 minutes.
Conversion check (quick math):
- 2% of 1 kg = 0.02 × 1000 g = 20 g.
- 4% of 1 kg = 40 g.Always measure carefully.
Troubleshooting — common problems & fixes
Problem: Uneven color/streaks
- Causes: Poor agitation, insufficient dispersant, fabric folded or trapped pockets.
- Fix: Re-do in a clean bath with better agitation, increase dispersant, and ensure fabric floats freely.
Problem: Surface staining/dye on finish but not penetrating the fiber
- Causes: Stain-resistant finishes or inadequate heat/carrier.
- Fix: If possible, strip finish (industrial chemical); otherwise, use pigment coating or printing.
Problem: Embossing softened or lost after dyeing
- Causes: Excessive mechanical action or prolonged high heat.
- Fix: For future runs, reduce agitation and time; for the current piece, consider re-embossing (not usually feasible at home).
Problem: Color is not dark enough
- Causes: Under-dosed dye (owf too low), short time, insufficient temperature.
- Fix: Re-bathe with higher owf (add dye gradually) or redo by industrial HT.
Problem: Fading quickly after washing or light exposure
- Causes: Poor fixation, wrong dye chemistry, low-quality dye.
- Fix: Use appropriate fixatives, test lightfastness; consider solution-dyed yarn for critical applications.
Care instructions for dyed microfiber fabric
- First, wash separately to remove excess dye.
- Cold or lukewarm water; mild detergent; avoid bleach.
- For upholstery, use manufacturer-approved spot cleaners; test in an inconspicuous area.
- Avoid high-heat tumble drying; air drying is gentler.
- For suede-like microfiber, brush the nap lightly to restore the hand after washing.
Environmental & regulatory considerations
- Wastewater: Disperse dyes and auxiliaries require wastewater treatment. Small-batch home dyeing releases smaller volumes but still requires responsible disposal. Industrial players must have treatment.
- Carriers & solvents: Many are volatile and require controlled use. Prefer low-impact auxiliaries when possible.
- Certifications: If selling consumer products as “green microfiber fabric,” verify claims with recognized certifications (e.g., GRS, OEKO-TEX Standard 100).
When to outsource to a professional dyehouse
Consider outsourcing when:
- You need consistent batch-to-batch color across hundreds of meters.
- You’re dyeing heavy microfiber fabric or upholstery rolls.
- You need solution-dyed or supercritical CO₂ dyed fabric.
- You require industrial-grade colorfastness for commercial or contract goods (hotels, automotive).
- You need regulatory compliance, lab testing (lightfastness, crockfastness, colorfastness to washing).
Professional dyehouses have controlled processes (HT dyeing, jet dyeers, pad-batch, continuous dyeing) that deliver predictable results and proper waste handling.
Practical checklist before you start
- Identify fiber (polyester? nylon? blend?).
- Determine final use (fashion, upholstery, automotive).
- Decide method (disperse dye HT, carrier-assisted boil, acid dye for nylon, sublimation for photo prints, pigment for surface).
- Calculate the owf and batch size; have measuring scales.
- Do test swatches for color, embossing, and fastness.
- Ensure safety (PPE, ventilation) and waste plan.
- Consider outsourcing for large or critical orders.
Dyeing microfiber fabric is a task that rewards preparation. The chemistry is more demanding than cotton, but the creative payoff is high: microfiber holds color beautifully when you match the right dye system and process. Whether you’re experimenting with a DIY revamp, producing green microfiber fabric with sustainability in mind, preserving the subtle detail of embossed microfiber fabric, or getting deep color into heavy microfiber fabric, the key is methodical testing and process control.