
Fleece is one of those fabrics that feels like a warm hug. Whether you’re sewing a cozy hoodie, making a winter blanket for a loved one, or producing garments in bulk, fleece always comes through with its softness, warmth, and ease of handling. But—and it’s a big but—cutting fleece straight can be a surprisingly frustrating challenge, even for experienced makers.
Cutting fleece fabric in a straight line might sound easy, but if you’ve ever tried it, you know it can get tricky fast. Whether you’re a beginner tackling your first DIY blanket or someone working with yards of bulk fleece fabric rolls in a small studio, getting that perfect edge takes a bit of know-how. In this guide, I’ll walk you through the simple methods I’ve used over the years to get clean cuts—nothing fancy, just real tips that work. We’ll also take a closer look at different fleece types—like solid color fleece fabric, striped fleece fabric, and thermal fleece fabric—and why each one behaves a little differently when you cut. And if you’re prepping winter fleece fabric for cozy seasonal crafts, you’ll find plenty of helpful takeaways here, too.
Why It’s Harder Than It Looks
Let’s start with the obvious question: why is fleece so tricky to cut straight?
It stretches. Even though fleece isn’t a knit, it has a bit of stretch, especially across the width.
It shifts. The nap (that fuzzy surface) creates drag, so layers don’t always sit still.
It hides mistakes. Ironically, because fleece is so forgiving, many people assume cutting doesn’t matter. But if you’re lining up stripes or trying to sew perfectly matched seams, a crooked cut throws everything off.
So, how do we fix that?

Step 1: Know Your Fabric
Not all fleece is created equal. Before you even think about cutting, take a moment to understand what kind of fleece you’re working with. This affects how it handles, how it lays on the table, and how you should approach your cuts.
Solid Color Fleece Fabric
This is the easiest to work with. No patterns to match, no directionality concerns—just one smooth field of color. But don’t let that simplicity fool you. Solid fleece can still stretch and shift if not handled properly.
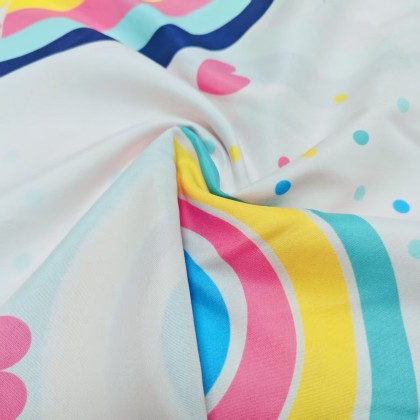
Striped Fleece Fabric
Stripes demand accuracy. If you’re off by even a quarter inch, the mismatch is obvious, especially in garments. You’ll need to align both the pattern and the grain.
Thermal Fleece Fabric
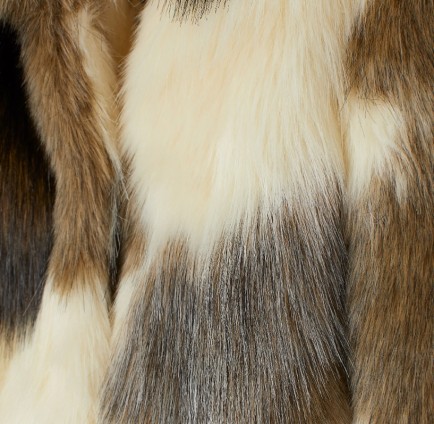
Thicker and often double-sided, thermal fleece fabric is made for warmth. That bulk, however, means it can be harder to fold precisely or press flat. It’s less forgiving when layered for cutting, so more care is needed.
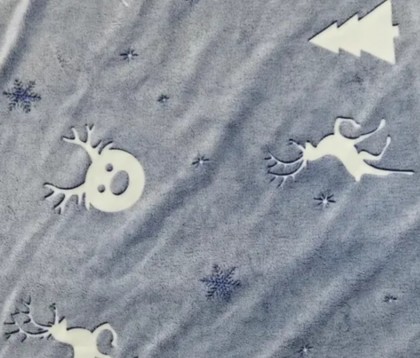
Winter Fleece Fabric
This term generally refers to fleece intended for cold-weather use. It can be plush, heavy, or even water-resistant. If you’re working with winter fleece fabric, take your time. It tends to be bulkier and needs more stability when cutting.
Bulk Fleece Fabric Rolls
When you’re cutting from bulk fleece fabric rolls, the stakes are higher. A small cutting error can multiply across dozens of pieces. Prepping large fabric rolls for precise cuts requires strategy—more on that later.
Step 2: Set Up a Cutting-Friendly Space
You don’t need a sewing studio, but your cutting surface matters a lot more than people think. Here’s what to get right:
Flat, hard surface: Your dining table works fine, as long as it’s wide and solid.
Self-healing cutting mat: Invest in a big one if you can. It helps align your cuts and protects your tools.
Good lighting: This isn’t optional. Shadows make it hard to judge straightness.
Acrylic ruler or T-square: Don’t just eyeball it—use tools that keep things aligned.
Sharp rotary cutter: Scissors work in some cases, but for long straight lines, nothing beats a rotary cutter with a fresh blade.
Step 3: Prepare the Fabric
Fleece doesn’t shrink much, but it can be distorted from rolling or storage. Here’s how to prep it properly:
Unroll and Let It Relax
If you’re cutting from bulk fleece fabric rolls, unroll the fabric and let it rest flat for a few hours, or overnight if possible. This allows the material to decompress and settle.
Identify the Grain
Fleece has a direction—both in stretch and in nap. The lengthwise grain runs parallel to the selvage (those clean factory edges). That’s your guide. Avoid cutting against it unless your pattern specifically calls for it.
Align the Selvages
This sounds simple, but it’s crucial. Match the selvage edges so that the grain runs evenly across your cutting surface. If your fabric is striped, use the stripes as a secondary reference point. Everything should look straight before you start marking.

Step 4: Mark Your Cut Line
Don’t skip this. You’ll be tempted to line up your ruler and just start cutting—but draw the line first.
Use tailor’s chalk, a washable marker, or even painter’s tape if you’re working with dark fleece. On striped fleece fabric, try to match the cut line with a stripe to reduce visibility issues.
For large pieces, measure from the selvage in multiple spots, mark dots, then connect them. It’s an old-school method, but it works.
Step 5: Cut with Confidence
Here’s how to get that perfect cut:
Place your acrylic ruler along the marked line.
Hold the ruler firmly with one hand, and guide your rotary cutter along the edge with the other.
Apply consistent pressure, and don’t rush. If it’s a thick fabric like thermal fleece, you may need to go over the line twice.
If you’re using scissors:
Cut in long, slow motions.
Don’t lift the fabric while cutting—let it lie flat.
Watch your line constantly; fleece can drift if you’re not focused.
Bonus: Cutting Multiple Layers
If you’re in production mode—say you’re working on a small line of fleece hoodies or cutting dozens of pieces from bulk fleece fabric rolls—you might want to cut multiple layers.
You can, but do this:
Limit yourself to 2-3 layers for thick fleece, 4-5 for thinner ones.
Use weights, not pins. Pins distort the fabric.
Cut with a new rotary blade. A dull one will crush the nap and shift layers.
Real Talk: Mistakes to Avoid
We’ve all done it. Here are common cutting mistakes—and how to dodge them:
| Mistake | Why It Happens | How to Prevent It |
|---|---|---|
| Cutting against the grain | Rushing or not checking the selvage | Always align the fabric grain first |
| Jagged cuts | A dull rotary blade or scissor snags | Replace blades regularly |
| Uneven stripe alignment | Ruler slippage or poor layout | Double-check before cutting |
| Stretch distortion | Pulling fabric while adjusting | Handle fleece gently and avoid tugging |
| Wrong nap direction | Overlooking surface texture | Always run your hand across before cutting |
What to Do After Cutting
Once you’ve made your cuts:
Label your pieces, especially if you’re stacking layers or mixing colors.
Store flat or roll: Folded fleece can crease awkwardly.
Serge the edges (optional): Fleece doesn’t fray, but serging gives a finished, clean edge—especially useful for gifts or client orders.

When You’re Buying Fleece in Bulk
Let’s say you’re running a small business, making fleece scarves, or prepping for a winter market. Working with bulk fleece fabric rolls changes the game.
Tips for Bulk Cutting:
Pre-cut manageable lengths from the roll (e.g., 5-yard segments).
Label each segment with color, nap direction, and fabric type.
Store in rolls to prevent creases and misalignment.
Buying in bulk is cost-effective, but mistakes multiply. Take your time. A single crooked cut on a 10-yard segment wastes a lot more than it would on a 1-yard piece.
Final Thoughts
Cutting fleece straight isn’t a complicated science—it’s a learned skill that improves with practice. But taking those extra few minutes to align the fabric, use the right tools, and respect the material makes a huge difference in your final results.
Whether you’re making a single no-sew throw from solid color fleece fabric, stitching matching sets from striped fleece fabric, crafting winter fleece fabric mittens, or working through bulk fleece fabric rolls for a seasonal launch, straight cuts set the tone for everything that follows.
So, take your time. Breathe. Measure twice. Cut once.
Quick Checklist: Fleece Cutting Essentials
✅ Rotary cutter with a fresh blade
✅ Acrylic ruler or T-square
✅ Tailor’s chalk or marking pen
✅ Flat surface and cutting mat
✅ Understanding of grain and nap
✅ Patience (can’t buy it, but you’ll need it)
Need help selecting the right fleece type for your next project? Consider your needs—softness, stretch, weight, warmth—and start small. If you’re unsure where to begin, contact us for personalized recommendations based on your project goals. And when you’re ready to scale, we’ll help you source the best bulk fleece fabric rolls to match your production needs.